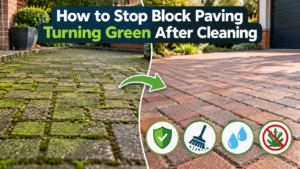

You spend a weekend getting your block paving looking sharp again. The colours are back, the joints look tidy, and the driveway finally looks like it belongs to your house. Then a few weeks of damp weather arrive and a green film starts creeping back across the surface.
It is one of the most common frustrations we hear from homeowners across Bournemouth, Poole, Christchurch and Ringwood. The good news is that green block paving is not a sign you did something wrong. It is a sign that the conditions around your paving are working in favour of algae. Change those conditions, and the green takes far longer to return.
In this guide we explain why block paving turns green so quickly, what goes wrong with many cleaning methods, and the exact steps that help keep your paving clean for longer.
Key takeaways
- Green growth returns because algae spores are always in the air and block paving offers moisture, shade and tiny gaps for them to settle in.
- Removing the visible green is only half the job. The spores, the damp and the debris all need dealing with.
- Harsh, close range pressure washing can strip jointing sand and roughen the surface, which can make regrowth easier.
- Refilling joints, treating the surface, improving drainage and sealing at the right time make the biggest difference.
- A simple seasonal routine is far easier than repeated deep cleans.
Why Does Block Paving Turn Green So Quickly?
The green you see is usually algae, sometimes mixed with moss, mould and lichen. These organisms start from microscopic spores that drift in the air all year round. You cannot stop them landing on your driveway or patio. What decides whether they settle and spread is the environment they land in.
Algae needs three things: moisture, shade and something to hold on to. Block paving provides all three more easily than most people realise.
Moisture. The UK climate keeps surfaces damp for much of the year. Algae is especially active through the wetter months, which is why many homeowners notice a green tinge as autumn moves into winter. Paving that stays wet after rain, or that sits in a low spot where water gathers, gives algae an ideal start.
Shade. Areas that miss the sun stay damp for longer. Paving beside a house wall, under trees, behind a fence or next to a garage often turns green first.
Texture and joints. Block paving is made of many individual blocks with narrow joints between them. Those joints hold sand, soil, leaf particles and water. This gives spores a small, sheltered, nutrient rich place to take hold, and from there they spread across the blocks.
Organic debris. Leaves, seeds, pollen, dust and grass clippings break down and feed algae and moss. A surface that is rarely swept builds up a thin layer of food without anyone noticing.
Green paving is also more than a cosmetic issue. A damp algae film becomes slippery underfoot, which matters on driveways, paths and steps that get regular use.
Why Block Paving Goes Green Again After Cleaning
This is the question behind most searches for this topic, so it deserves a straight answer. There are usually several reasons working together.
1. The visible growth was removed, but the conditions stayed the same
If the paving still sits in shade, still stays damp and still collects leaves, it is simply a clean surface waiting to be recolonised. Spores land again and the cycle restarts.
2. The cleaning method was too harsh
A pressure washer used too close, at too high a setting, can do real damage to block paving. It can blast the sand out of the joints and roughen the top of the blocks. Empty joints let in water, weed seeds and soil. A rougher surface gives algae more to cling to. The result is a driveway that looks clean for a short time and then regrows quickly.
This does not mean pressure is always the wrong tool. Controlled pressure, correct nozzles and the right distance are very different from a quick blast with a hired machine. Professional cleaning also follows the wash with the steps that protect the result, which brings us to the next point.
3. Nothing was done after the wash
Washing removes what is on the surface. It does not stop new spores arriving. Without a treatment or protective step afterwards, there is nothing slowing regrowth down.
4. The joints were left empty or only partly filled
Joints do an important job. Properly filled joints lock the blocks together, keep weeds out and limit how much water and debris can sit between the blocks. Leaving them depleted after cleaning is one of the most common reasons paving looks tired again so soon.
5. Water is still collecting on the surface
Paving that holds standing water, or that receives constant runoff from a roof or downpipe, will stay damp long after the rain has stopped. Algae loves that.
How to Stop Block Paving Turning Green After Cleaning
Here is the full process, in the order that works best.
Step 1: Clean the surface properly in the first place
Everything that follows depends on a thorough, careful clean. Aim to remove algae, moss, lichen, weeds and ingrained dirt without damaging the blocks or jointing. Low pressure and steam based methods are gentler on paving than aggressive blasting, and they are well suited to removing organic growth without stripping the joints.
If you clean the paving yourself, keep the nozzle at a sensible distance, keep the lance moving, and avoid concentrating pressure on the joints. Test any product on a small, hidden area first.
Step 2: Let the paving dry fully
Many of the next steps only work on a dry surface. Rushing straight to sanding or sealing traps moisture in the joints and surface, which is exactly what you are trying to avoid. Choose a dry spell and give the paving time to dry out properly.
Step 3: Treat the surface to slow regrowth
Cleaning removes the green. A treatment designed for algae, moss and mould helps slow its return by dealing with the spores that remain on the surface. Always choose a product that is suitable for use on paving and approved for the job, and follow the manufacturer’s directions exactly.
Be careful with home remedies. Bleach can harm nearby plants and grass, can run off into planting areas, and may discolour some surfaces. Vinegar is acidic and can dull or etch certain materials. Neither is a dependable long term answer, and both are worth testing on a small hidden patch before use, if you use them at all.
Step 4: Refill the joints
Once the surface is clean and dry, the joints need to be topped up. Sand is a good choice, because it keeps the blocks locked together and reduces the gaps where soil and spores collect. Polymeric jointing sand goes a step further. It hardens after it is activated, which helps resist weed growth, ant activity and wash out. It does need dry weather to set properly, so timing matters.
Brush the sand in until the joints are full, then clear any excess from the surface so it does not mark the blocks.
Step 5: Consider sealing the paving
Sealing is one of the most effective ways to make a cleaned driveway easier to look after. A good quality, breathable block paving sealant helps reduce how much moisture and dirt the surface absorbs. That makes it harder for algae to establish and easier to wipe or sweep clean later. Sealing also helps lock the jointing sand in place and can bring out the colour of the blocks.
Two points are important here. First, sealing must only happen on a completely clean, completely dry surface, otherwise you seal the problem in. Second, sealing reduces regrowth but does not make paving immune to algae, so regular sweeping and occasional maintenance still apply.
Step 6: Fix the water problem
If your paving stays wet, tackle the cause rather than the symptom.
- Check that the surface falls away from the house so water runs off instead of pooling.
- Make sure drains, channels and gullies are clear and flowing.
- Look at your gutters and downpipes. An overflowing or leaking gutter can pour water onto the same patch of paving every time it rains, which is a classic reason for green streaks. If this sounds familiar, our guide on why gutters overflow when it rains explains the common causes and how to spot them.
- Keep soil, bark and mulch from planting beds from washing onto the paving.
Step 7: Bring in more light and airflow
Sunlight and moving air dry paving out faster. Where you can, trim back overhanging branches, cut back dense hedging and thin out overgrown shrubs beside paved areas. Even a small improvement in light can noticeably slow regrowth in the shadiest spots.
Step 8: Sweep regularly
Leaves and debris are algae’s food supply. A quick sweep every week or two, and especially through autumn, stops that layer building up. Use a soft or medium brush so you do not scrub sand out of the joints.
Keep Your Block Paving Green Free with a Simple Seasonal Routine
You do not need to be out there every weekend. A light routine is enough for most homes.
Autumn: Sweep leaves regularly and keep gutters and drains clear so the wet season starts with the paving in good shape. This is also a smart time to deal with the roof and gutters, because moss and algae on a roof wash down onto the paving below. Our article on roof cleaning before winter covers why timing matters.
Winter: Keep an eye on shaded corners and spots that stay wet. Sweep when you can.
Spring: Check the jointing sand, top up any gaps and treat any early signs of green before they spread.
Summer: This is the best time for sealing and for any repairs to the joints, as the dry weather lets products cure properly.
Common Mistakes That Bring the Green Back
- Pressure washing too hard or too close and clearing out the joints.
- Skipping any treatment or protection after the wash.
- Sealing damp paving or paving that is not completely clean.
- Leaving the joints empty or only half filled.
- Ignoring leaking gutters, blocked drains or standing water.
- Using bleach or other strong chemicals without testing, near plants, or without following safety guidance.
- Letting leaves and debris build up for months.
Does the Same Green Problem Affect Other Surfaces?
Yes, and it often spreads. The same conditions that turn block paving green also affect patios, paths, roofs and walls, and growth on one surface can feed another. Algae and moss on a roof wash down into gutters and onto paving. Damp rendered walls can streak and stain. If you are seeing green on several parts of your property, it is worth looking at the whole picture. You can read more about what causes green stains on rendered walls if your house walls are showing the same signs.
When to Call a Professional
DIY cleaning can work well on small areas, but there are good reasons to call in a specialist.
- The paving is large, heavily stained or covered in moss and weeds.
- You want to avoid damaging the joints and blocks.
- You want the surface cleaned, treated, re sanded and sealed as one properly sequenced job.
- The green keeps coming back in the same places and you want to find out why.
- You would rather not work around the weather, tools and products yourself.
Our team provides professional driveway cleaning and patio cleaning across Bournemouth, Poole, Christchurch and Ringwood, using careful methods that remove algae, moss and grime without harming your paving. If your block paving keeps turning green, get in touch and we will recommend the right approach for your property.
Frequently Asked Questions
Why does my block paving turn green so fast after cleaning?
Algae spores are always present in the air, and block paving provides moisture, shade and sheltered joints where they can settle. If the surface stays damp, the joints are empty or nothing was applied after washing, regrowth can start quickly.
How long should a clean block paved driveway stay clean?
It varies with shade, drainage, nearby trees and how well it is maintained. A driveway in full sun with good drainage will stay clean far longer than one beside a shaded wall. Sealing, filled joints and regular sweeping all extend the time between cleans.
Is pressure washing bad for block paving?
Not when it is done carefully. Used too close or at too high a setting, it can remove jointing sand and roughen the surface, which can encourage regrowth. Controlled pressure, the right technique and proper aftercare make a big difference.
Does sealing stop block paving going green?
Sealing helps by reducing how much moisture and dirt the surface absorbs, which makes it harder for algae to take hold and easier to keep clean. It does not make paving completely immune, so some light maintenance is still needed.
Can I stop algae from growing altogether?
Not completely, because spores are everywhere. What you can do is make the surface a much less welcoming place through cleaning, filled joints, good drainage, light, regular sweeping and sealing.
What is the best time of year to clean and protect block paving?
Algae is most active in the damp months, so a clean in autumn or spring helps keep problems in check. Sealing and jointing work best in a dry spell with settled weather, which is often easier in late spring and summer.
Final Thoughts
Block paving turns green because conditions around it favour algae, not because your cleaning failed. Remove the growth carefully, let the paving dry, treat the surface, refill the joints, consider sealing and fix the sources of damp, and you can enjoy a clean driveway or patio for a good deal longer.
If you would like help getting your block paving cleaned and protected properly, the team at Platinum Exterior Cleaning is here to help.